Posted by Half Price Banners on Apr 14th 2025
Mistakes to Avoid When Ordering a Player Banner Online
Ordering a player banner online is a straightforward process, but it can be easy to make mistakes if you're unfamiliar with the steps involved.
Whether you're designing a banner to celebrate an athlete's achievements, creating a custom poster for a team, or commemorating a special event, it’s important to understand the key aspects of the design and ordering process.
In this blog, we’ll walk you through the process of ordering a custom player banner from Half Price Banners, highlighting common mistakes to avoid and ensuring your banner turns out exactly how you envision it.
Start by Navigating to the Player Banner Product
The first step in creating your player banner is to begin the design process. You’ll need to navigate the website to the section for player banners.
Common Mistakes to Avoid:
It’s easy to get lost or confused when navigating a website with many options. The best way is to click the link above or search for “Player banner” in the search bar.
Select Your Banner Options
Once you’ve arrived at the design page, it’s time to choose the specific details for your banner.
- Custom Size: You’ll be asked to choose the size of your banner. Be sure to consider the space where it will be displayed. Standard sizes are available, such as 1.7x3 ft or 2x3 ft, but you can opt for a custom size later to fit your needs.
- Pole Pockets: If you plan to hang the banner on a pole or stand, you'll need to select the pole pockets option.
- Finishing Options: Depending on your needs, choose finishing options including grommets (metal rings for hanging) or hems (edges reinforced with stitching) to make your banner durable and easy to display. The standard grommet placement is every 2 in unless specified.
Common Mistakes to Avoid:
Many people forget to select the pole pockets or the right finishing options. Without these, your banner might not be ready for certain display methods. Double-check that all of your choices match your display plans before moving on.
Begin Designing
Now the fun part: designing your player banner. This is where you bring your ideas to life with personalized elements like photos, text, and logos.
- Click the “Design Online” button.
- On the next screen, click the red “Design Now” button at the bottom of the page.
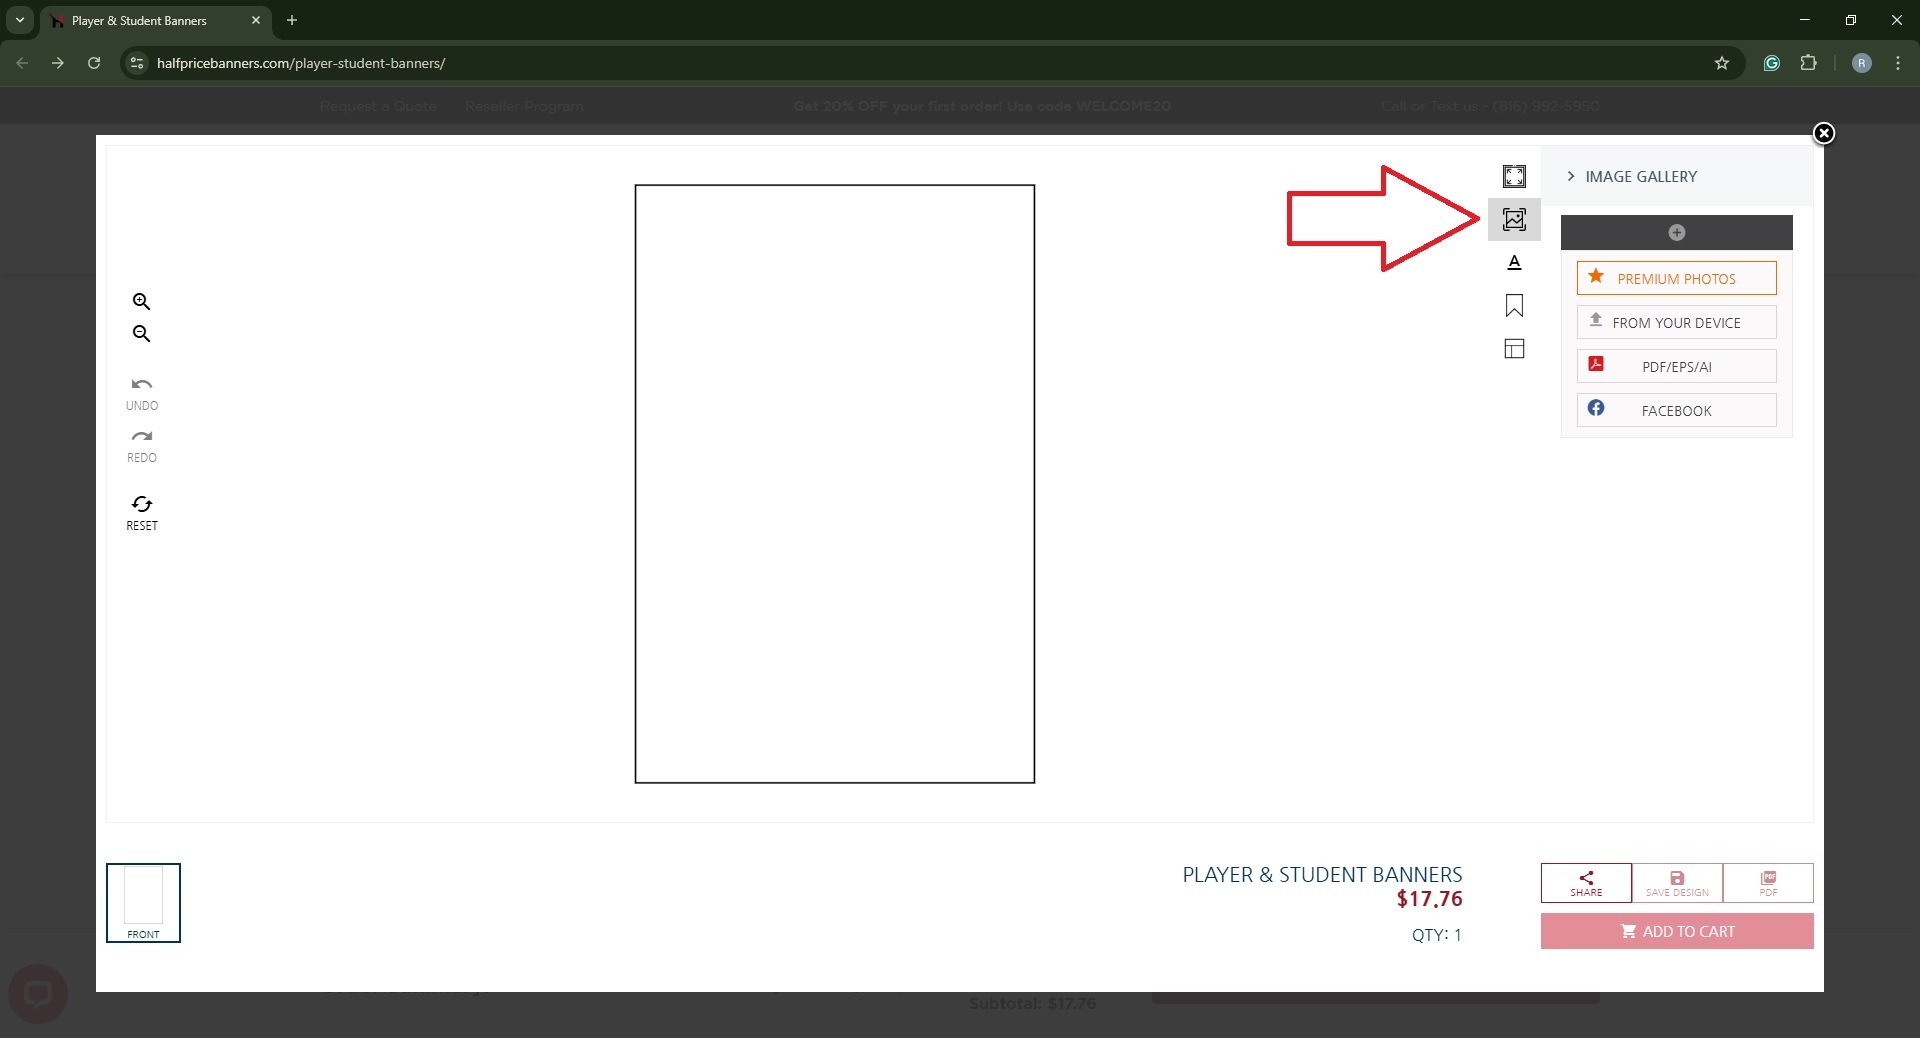
- From here, click the image gallery icon to choose a photo.
Uploading Your Image: You can upload a photo directly from your device by selecting the “+” button, or you can select an image you've previously uploaded from your gallery.

Common Mistakes to Avoid:
Not uploading a high-quality image can lead to blurry or pixelated banners. Be sure to upload a high-resolution image for the best print quality, especially for something as important as an athlete's banner. The clearer the image, the more professional your final product will look.
Resizing and Positioning Your Image:
Once your photo is uploaded, use the design tool to resize and position the image exactly how you want it on the banner. You can adjust the alignment to make sure everything fits perfectly.
Add Text and Customizations
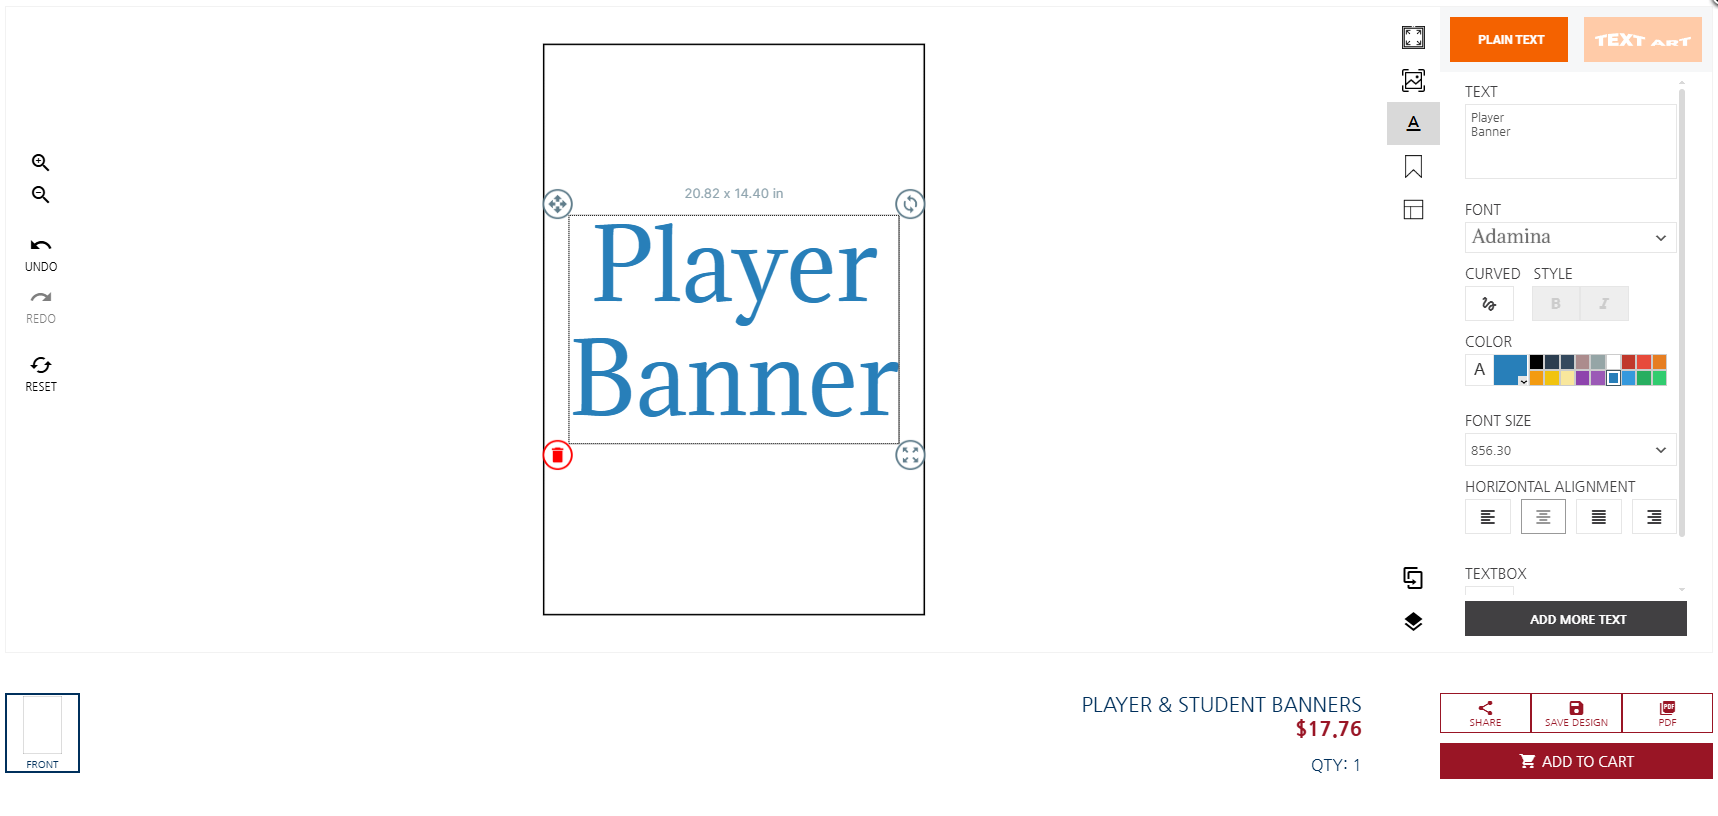
Now that your photo is in place, it’s time to add any text, such as the athlete’s name, jersey number, team name, or a quote.
- Use the text tool to add custom text.
- You can adjust the font, color, size, and placement of the text to ensure it’s legible and matches the overall design.

Common Mistakes to Avoid:
Overloading the banner with too much text can make it look cluttered. Keep the text minimal but impactful, highlighting key details such as the athlete's name and number.
Optional: Upload a Pre-Made Design
If you already have a design created on another platform (like Canva), you can upload the full design to Half Price Banners. This allows you to skip the design step and directly use your pre-made artwork. Choose “Upload Artwork,” then choose a file.
Common Mistakes to Avoid:
Ensure your pre-made design is the correct size and resolution. The wrong dimensions or poor image quality can affect the final product. Double-check the design before uploading it to avoid rework.
Add to Cart
Don’t forget to review your design and make any last-minute tweaks. Once your design is complete and you’re satisfied with how it looks, it’s time to add it to your shopping cart.
Common Mistakes to Avoid:
Before proceeding to checkout, double-check the order for any mistakes, especially the banner size, text, and photo. It’s easy to miss a detail in the excitement of completing your design.
Checkout
Now that your banner is ready, head to the checkout page:
- Review Order Details: Make sure everything is correct before proceeding.
- Enter Your Email Address: You’ll need an email to receive proofs and approve your design.
- Shipping and Billing Information: Fill in your details, including shipping and billing info.
- Add Coupon/Gift Certificate: Below your order summary, select “Coupon/Gift Certificate” and type in your unique code to redeem your discount or gift certificate value.
Common Mistakes to Avoid:
Make sure you enter the correct shipping address, especially if you're ordering for a team or an event. A shipping address mistake may delay delivery.
Delivery Time:
Once you place the order, you will receive an art proof within 24 hours. Once you approve your art proof, your banner will typically ship within 5-7 business days. You’ll also have the option to choose expedited production and shipment at checkout if you need your banner faster.
Ordering a player banner online doesn’t have to be complicated if you follow these steps carefully.
By taking the time to select the right options, uploading high-quality images, and customizing the text and design, you’ll end up with a banner that truly stands out, showcasing the athlete or team in the best light possible.

